
This tutorial was kindly contributed by Klaytn Developer Ambassador Henry Pham.
Introduction
End-to-end testing is an essential part of software development. It is the process of testing an application from start to finish to ensure that it works as intended. Synpress is a library built on top of Cypress that simplifies the process of end-to-end testing in blockchain applications. In this article, we will explore how to use Synpress to test the login functionality of a decentralized application (dApp) that uses Metamask.
Step 1: Set Up Your Environment
Before we can begin testing with Synpress, we need to set up our environment. To get started, you will need to install Node.js, Metamask, and Synpress.
1. Install Node.js: Synpress is built on top of Cypress, which requires Node.js to be installed on your machine. If you don’t already have Node.js installed, you can download it from the official website:
2. Install Metamask: Metamask is a browser extension that allows users to connect to Ethereum dApps. You’ll need to install Metamask in the browser that you’ll be testing your dApp on. You can download Metamask from the Chrome Web Store or the Firefox Add-ons Marketplace.
3. Install Synpress: Synpress is a plugin for Cypress that adds support for interacting with Metamask. To install Synpress, clone this repository:
git clone https://github.com/cuongpo/synpress_learning4. Install dependencies
yarn install5. Change env file
NETWORK_NAME=mainnet
PRIVATE_KEY="{YOUR_PRIVATE_KEY}"
DEBUG=synpress:*
Step 2: Write Your Test Scenario
Once you have set up your environment, the next step is to write your test scenario. In this example, we will be testing the login functionality of a dApp that uses Metamask. Go to tests/e2e/specs – create new file e.g loginToMetamask.js:
1. First, we start with a describe block that describes the test scenario we’re testing: “Login with Metamask”.
describe('Metamask Extension tests', () => {2. Define the test case “connect to DApp with Metamask extension example”
it('connect to DApp with Metamask extension example', () => {3. Add a new network to Metamask using the cy.addMetamaskNetwork() command
cy.addMetamaskNetwork({
      networkName: 'Klaytn Baobab',
      rpcUrl: 'https://api.baobab.klaytn.net:8651',
      chainId: '1001',
      symbol: 'KLAY',
      blockExplorer: 'https://baobab.scope.klaytn.com/',
      isTestnet: true,
    })
4. Visit the root URL of the DApp
cy.visit('/');5. Click the “Connect” button on the DApp
cy.get('#connectButton').click();6. Accept the Metamask access request by clicking the “Connect” button in the Metamask popup
cy.acceptMetamaskAccess().should('be.true');7. Assert that the “Connect” button on the DApp shows the text “Connected”
cy.get('#connectButton').should('have.text', 'Connected');Full code:
// Define the test suite "Metamask Extension tests"
describe('Metamask Extension tests', () => {

  // Define the test case "connect to DApp with Metamask extension example"
  it('connect to DApp with Metamask extension example', () => {

    // Add a new network to Metamask using the `cy.addMetamaskNetwork()` command
    cy.addMetamaskNetwork({
      networkName: 'Klaytn Baobab',
      rpcUrl: '<https://api.baobab.klaytn.net:8651',>
      chainId: '1001',
      symbol: 'KLAY',
      blockExplorer: '<https://baobab.scope.klaytn.com/',>
      isTestnet: true,
    })

    // Visit the root URL of the DApp
    cy.visit('/');

    // Click the "Connect" button on the DApp
    cy.get('#connectButton').click();

    // Accept the Metamask access request by clicking the "Connect" button in the Metamask popup
    cy.acceptMetamaskAccess().should('be.true');

    // Assert that the "Connect" button on the DApp shows the text "Connected"
    cy.get('#connectButton').should('have.text', 'Connected');

  });

  // Define the test case "create transaction example"
  it('create transaction example', () => {

    // Click the "Send" button on the DApp
    cy.get('#sendButton').click();

    // Confirm the Metamask transaction by clicking the "Confirm" button in the Metamask popup
    cy.confirmMetamaskTransaction().should('be.true');
  });

  // Define the test case "confirm signature example"
  it('confirm signature example', () => {

    // Click the "Sign" button on the DApp
    cy.get('#ethSign').click();

    // Confirm the Metamask signature request by clicking the "Sign" button in the Metamask popup
    cy.confirmMetamaskSignatureRequest().should('be.true');
  });
})
Step 3: Run Your Test
Once you have written your test scenario, the next step is to run your test. You can run your test using the Cypress Test Runner. To open the Test Runner, open your terminal and enter the following command:
yarn test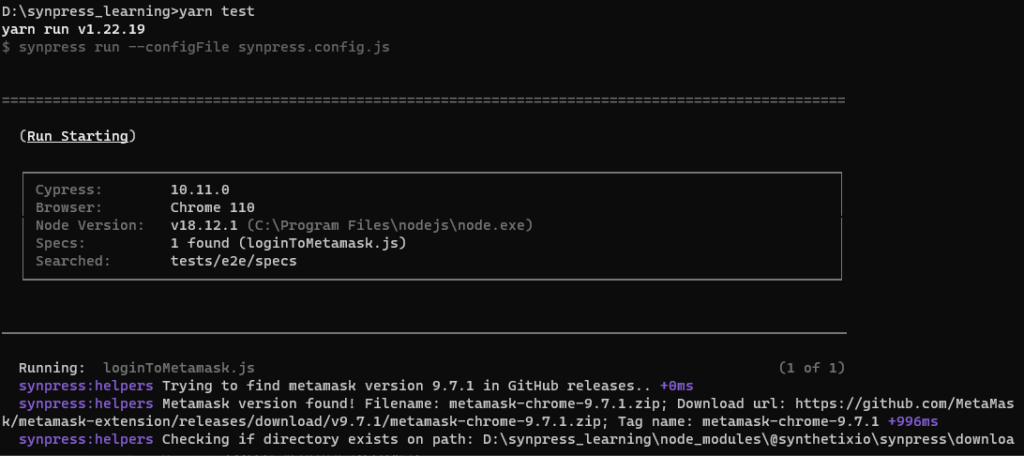
This will open the Test Runner, which allows you to run your test and view its results. In the Test Runner, you can select the test file that you want to run, and then click the “Run” button to execute the test.
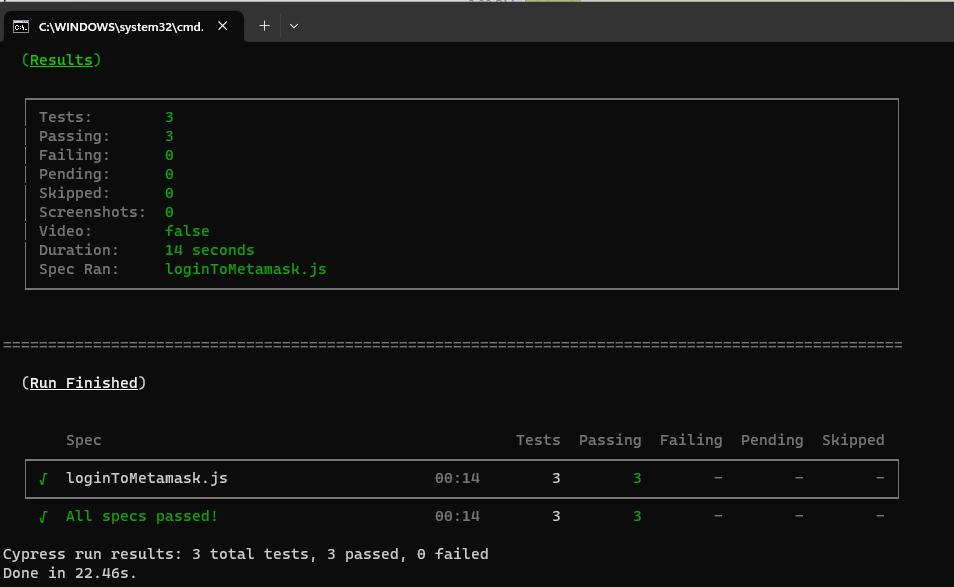
Step 4: Review Your Test Results
Once your test has finished running, the Test Runner will display the results. The results will show you which tests passed and which tests failed. You can also view detailed information about each test, including the steps that Synpress took and any errors that occurred.
Errors you might likely encounter
- Incorrect network configuration: Users may encounter errors if they input the wrong network configuration settings for their tests. For example, if the network name, RPC URL, or chain ID are incorrect, tests may fail to connect to the intended network or interact with the desired smart contract. It is important to ensure that the network configuration is correct before running tests. Users can refer to the Synpress documentation for guidance on setting up network configuration settings.

- Incorrect element selection: Users may also encounter errors if they select the wrong element on the page, or if the element they are trying to interact with is not yet visible or clickable. It is important to use the correct selector syntax and to verify that the element is available before attempting to interact with it in the test. Users can refer to the Cypress documentation about element selection for guidance on selecting elements in their tests: https://docs.cypress.io/guides/core-concepts/interacting-with-elements.html#Element-Selection. This page provides examples and best practices for selecting elements, verifying their visibility and interactivity, and chaining actions and assertions on them.
Conclusion
In conclusion, Synpress is a powerful library that can help you automate your end-to-end testing process in blockchain applications. By following these steps, you can get started with Synpress and start testing the login functionality of your dApp with Metamask.