Building an NFT Collection Gallery on Klaytn using React.js and Unmarshal SDK
Overview
Fetching and processing data directly from blockchain networks can be complex and time-consuming.Real-time services that abstract away the complexity of direct interaction with blockchain networks are the go-to solutions for developers and enterprise builders. The availability of such services grants developers more time to build their use cases without having to worry about directly fetching data from the blockchain.
One such protocol or service that provides easy access to blockchain data is Unmarshal. With Unmarshal, you can easily query blockchain data from 20+ chains, including Klaytn. This tutorial explores Unmarshal, its product suite, and further delves into building an NFT gallery collection using Unmarshal’s NFT/Metaverse API.
The final output will look like this:
Prerequisites
- Fundamental knowledge of React.js
- Unmarshal API Key from console.unmarshal.io
- A code editor (i.e., VScode)
Diving into Unmarshal and its Product Suite
Unmarshal is a one-stop solution for comprehensive APIs that cater to all the needs of decentralized applications (dApps), hence empowering dApp developers and users with accurate and reliable blockchain data. Are you trying to build a decentralized finance (DeFi) application? exploring the world of NFTs? or just delving into various use cases? Unmarshal has the APIs you need to accelerate your development process and unlock the full potential of blockchain data.
Consider the following features available in Unmarshal’s product suite:
a. DeFi APIs: This API helps fetch multi-chain data for token assets, transactions, token holders, and more.
b. NFT/Metaverse APIs: This API helps query NFT possessions and transactions in wallets.
c. Notification Service: With the Unmarshal notification service, you can easily alert users seamlessly across devices.
Getting Started
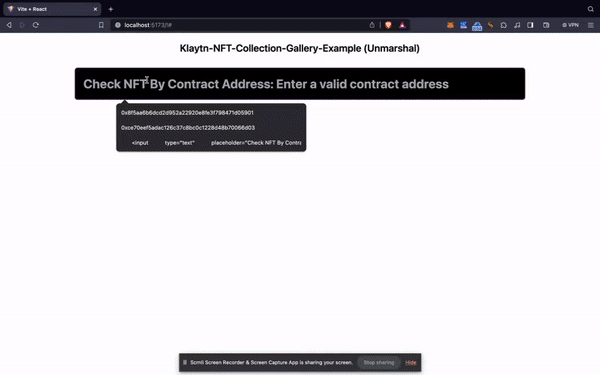
In this tutorial, we will use the Unmarshal NFT API to build an NFT collection gallery which displays all NFTs available for a specified contract address.
Setting up your React Project and installing Unmarshal SDK
Now that we are familiar with Unmarshal and its product suite, we can start building! In this section, we will create our React app and install the required dependencies.
First, let us create a Vite + React project directory by running the following command:
npm create vite@latest my-nft-gallery -- --template reactOnce our project directory is created, let us navigate inside it and install the required dependencies. We will be installing Ethers.js to verify if the NFT contract address is valid and will also use TailwindCSS to make our frontend look beautiful!
cd my-nft-gallery
npm install -D tailwindcss postcss autoprefixer
npx tailwindcss init -p
npm install ethers@5.7.2
Next is to install the Unmarshal SDK; a library that gives us access to the powerful Unmarshal Server backend from your React.js app.
npm install @unmarshal/sdkAdditionally, we will have to configure our `tailwind.config.js` and index.css file.
a. Open the code editor and replace the content in `tailwind.config.js` with the following code:
/** @type {import('tailwindcss').Config} */
export default {
  content: [
    "./index.html",
    "./src/**/*.{js,ts,jsx,tsx}",
  ],
  theme: {
    extend: {},
  },
  plugins: [],
}
b. Replace the content in `index.css` with the following code:
@tailwind base;
@tailwind components;
@tailwind utilities;
To see your application build in real time, run `npm run dev`
Building the NFT Gallery
In this section, we will build the functions and components needed to fetch, load and display NFT data on our frontend.
First, we will replace the code in src/App.jsx with the following code:
import { useState } from "react";
import { Unmarshal, Chain } from "@unmarshal/sdk";
import { ethers } from "ethers";
import NFTDetails from "../components/NFTDetails";
import Pagination from "../components/Pagination";
const unmarshal = new Unmarshal({
  apiKey: "PASTE API KEY",
});
export default function App() {
  	const [nfts, setNFTs] = useState([]);
  	const [address, setAddress] = useState("");
	const [currentPage, setCurrentPage] = useState(1);
 	const [postPerPage] = useState(20);

const fetchNFTsByContractAddress = async (_address, _page) => {
    const res = await unmarshal.NFT.getContractTokenDetails(
      Chain.klaytn,
      _address,
      {page: _page, pageSize: postPerPage}
    );
    console.log(res.data);
    setNFTs(res.data.nft_token_details);
  };
  const handleNFTsByContractAddress = async (event) => {
    event.preventDefault();
    const _contractAddress = event.target.contractAddress.value;
    const resp = ethers.isAddress(_contractAddress);
    if (!resp) {
      alert("Pass a valid contract address");
    }
    setAddress(_contractAddress);
    console.log(_contractAddress, resp);
    fetchNFTsByContractAddress(_contractAddress, currentPage);
  };
  const paginate = (pageNumber) => {
    setCurrentPage(pageNumber)
    if(address) {
      fetchNFTsByContractAddress(address, currentPage);
    }
  }

  return (
    <>
    <h3 className="text-center m-5 font-semibold text-2xl">Klaytn-NFT-Collection-Gallery-Example (Unmarshal) </h3>
      <form
        onSubmit={handleNFTsByContractAddress}
        className="flex flex-wrap flex-row justify-items-center justify-center w-full m-auto"
      >
        <input
          type="text"
          placeholder="Check NFT By Contract Address: Enter a valid contract address"
          name="contractAddress"
          className="text-3xl font-bold rounded-md bg-black text-white m-3 p-5 w-3/4"
        />
      </form>
      <div className="flex flex-row flex-wrap gap-3 w-fit p-10 m-auto justify-between">
        {nfts &&
          nfts.map((item, index) => <NFTDetails key={index} item={item} />)}
      </div>
      { nfts.length > 0 && (<Pagination paginate={paginate}/>) }
    </>
  );
}
Code Walkthrough
Let’s go over the functionality of the code above:
Starting from Line 1, we first imported the necessary libraries and components. Next, we created four useState variables crucial for the development of the NFT collection gallery. One such variable is the nfts state variable, which will hold the value of NFT data (e.g., name, owner, token ID, traits, etc.). The address useState variable will be used to track the NFT contract address the user searches for. Additionally, the other two useState variables were added to store the currentPage and the postPerPage to be displayed when the NFT data is readily available.
Next, we created a fetchNFTsByContractAddress function that uses the unmarshal.NFT.getContractTokenDetails() method of the Unmarshal NFT API. This method takes in three parameters: the chain (in our case, Klaytn), an NFT contract address, and an optional PaginationQuery object ({page & pageSize}). The paginationQuery object basically contains the page number we would like returned (i.e., page) and the number of NFTs we would like returned on each page (i.e., pageSize). For the purpose of this example, we set the postPerPage value to 20 and the page to 1. Feel free to modify these values. Finally, when this function is called, it sets the fetched NFT data in the nfts variable.
Furthermore, in the return() call (which contains our JSX), we declared an h3 (which contains a mini-title) and a form tag (which houses the search functionality using the NFT contract address and its associated event handling). While the search form takes in a handleNFTsByContractAddress function in its onSubmit event handler, this function uses ethers.js to validate if the address inputted is valid and also sets the NFT contract address in the address variable.
It is important to note that our logic is that if the search is valid, we will map over each NFT in the response and map it into our NFTDetails component. Ideally, we will create a new folder under the src directory called components. Once our components folder is created, we will make a new file inside it called NFTDetails.jsx and input the following code:
import React from "react";
const NFTDetails = ({ item }) => {
  return (
    <div  className="p-5 bg-black text-white">
      <div className="flex flex-row gap-3 justify-between">
        <h1>{item.name}</h1>
        <p>{item.token_id}</p>
      </div>
      <p>{item.actual_owner}</p>
      <img src={item.image_url} alt="" width="400px" />
    </div>
  );
};
export default NFTDetails;
The code above returns an NFTDetails component which will render the NFT and its metadata. Lastly, we will need to create another component to render our pagination section. Create a file in the components called Pagination.jsx, then input the following code:
import React from "react";
const Pagination = ({paginate}) => {
    const pageNumbers = [];

    for (let i = 1; i < 250; i++) {
        pageNumbers.push(i);

    }

    return (
        <nav className="w-4/4 m-auto mt-10">
            <ul className="flex flex-row gap-10 flex-wrap justify-center justify-items-center">
                {pageNumbers.map((number) => (
                    <li key={number} className="m-5">
                        <a onClick={() => paginate(number)} href="!#" className="bg-black text-white p-5">
                            {number}
                        </a>
                    </li>
                ))}
            </ul>
        </nav>
    )
}
export default Pagination
The code above does the following:
- Loops through 250 (total number of pages available when nft data is returned) and stores them in the pageNumber variable.
- In the return() call (which contains our jsx), we map through the pageNumbers so as to display <li></li> with an onClick event handler that calls the paginate function.
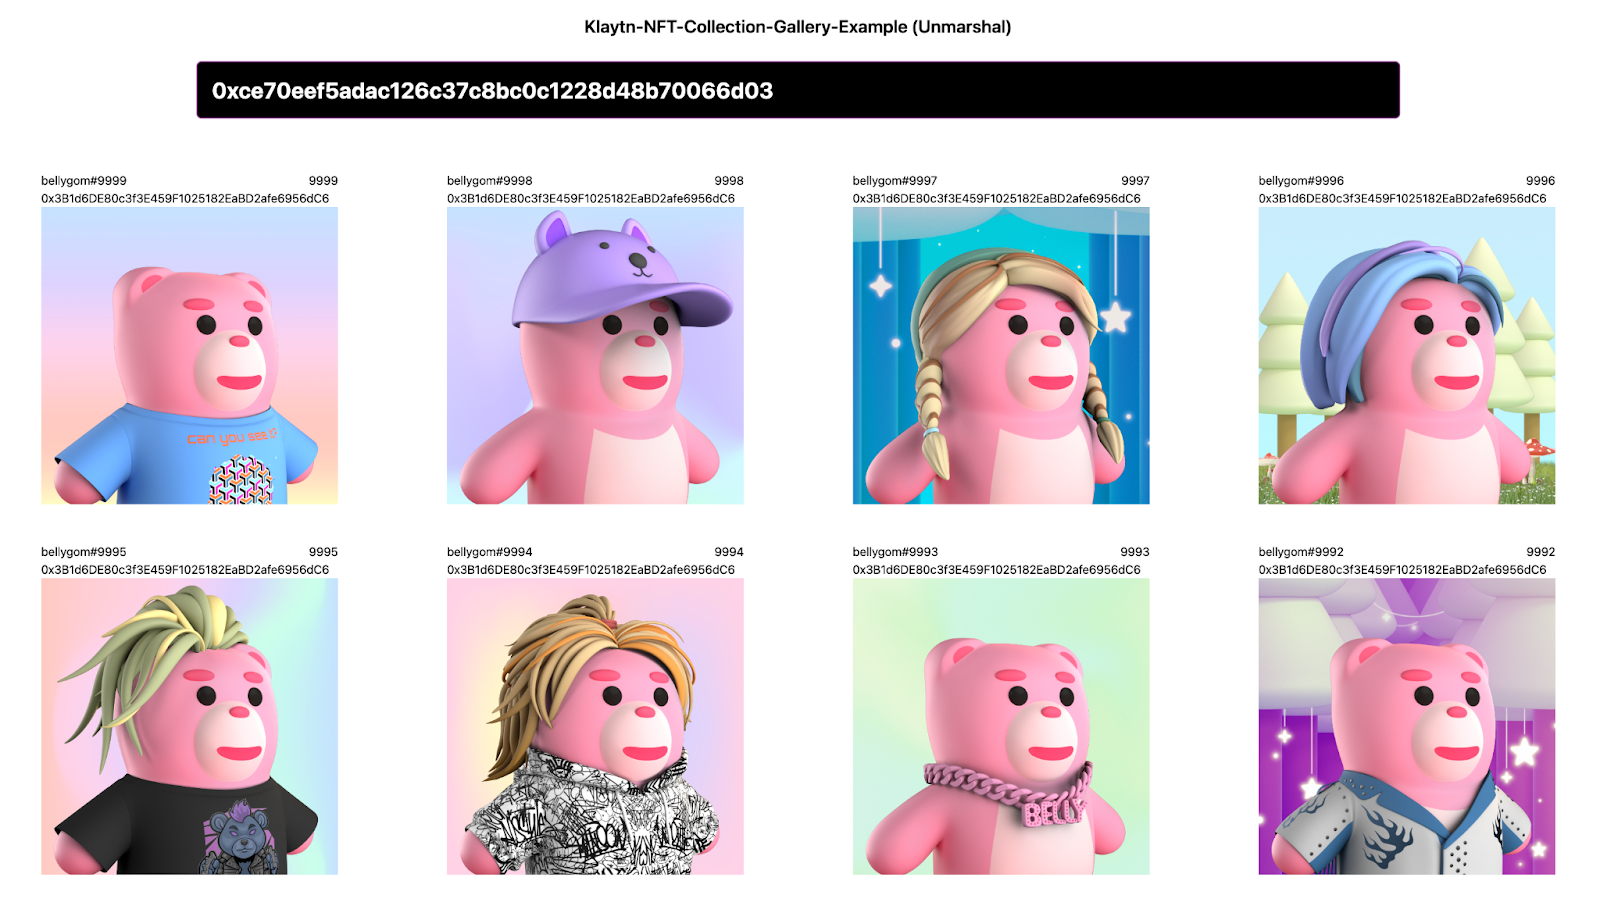
At this point, if you have followed all the instructions correctly, paste any NFT contract address. Your NFT gallery should display beautifully. For example, paste this contract address: 0xce70eef5adac126c37c8bc0c1228d48b70066d03, which belongs to the Belly Gom World Official collection.
Also you can use these additional contract addresses to test your new NFT Gallery!
- Sunmiya Club Official : 0x8f5aa6b6dcd2d952a22920e8fe3f798471d0590
- Meta Toy Dragonz: 0x46dbdc7965cf3cd2257c054feab941a05ff46488
- Mutant Kongz & G.rilla Official: 0x3f635476023a6422478cf288ecaeb3fdcf025e9f
Conclusion
Congratulations on building your NFT gallery using Unmarshal SDK. In this tutorial you learnt about Unmarshal, its product suite and most importantly how to query the Unmarshal NFT API for Klaytn(Cypress) NFT contract and display it on your React app.
From here, you could also explore some other options in your NFT gallery like adding for each NFT a new page that displays the traits and also transaction history. If you want more information, visit Klaytn Documentation and Unmarshal Documentation. If you have any questions, visit Klaytn Forum.