
Overview
Token staking is one of the ways developers or builders in the crypto space allow users to actively participate in securing and assisting in the operations of their app or network in return for passive rewards. Staking in itself refers to the practice of locking up your cryptocurrency in the network to assist with transaction validation and support the operations of a blockchain network.
Examples of popular staking dapps in the Klaytn ecosystem include Klaystation,Everstake, Swapscanner,Klayswap, etc. In this tutorial, you will build an ERC20 token dApp using Thirdweb on Klaytn. This staking dapp provides simple functionalities that allow users to stake ERC20 tokens, unstake, and also claim respective rewards.
The final output will look like this:
Prerequisites
Before delving into the entire project, it’s important to note that its finished form can be found in this repository: erc20-staking-example. If you would like to follow along, the prerequisites are as follows:
- Command-line basics.
- Basic and fundamental React knowledge
- You must have created a ThirdWeb account and a ClientID.
Getting Started
Thirdweb is a complete web3 development toolkit that provides everything you need to connect your apps and games to decentralized networks. In this tutorial, we will be using Thirdweb’s Stake ERC20 contract to build a staking dapp that allows users to stake their ERC-20 tokens and get ERC-20 tokens as rewards (different from the staked tokens) on Klaytn Cypress. As a result, this application would have three major functionalities, viz.
- Stake: which allows users to lock up their tokens in the staking contract for a period of time.
- Unstake: which allows users to withdraw their respective stakes from the staking contract.
- ClaimRewards: which allows users to claim respective staking rewards based on the amount staked and the amount of time these tokens were staked. See Stake ERC20 to understand more about reward calculation at the time of claiming rewards.
Troubleshooting
To follow along in this guide, you can deploy to Klaytn Baobab instead of Klaytn Cypress using thirdweb dashboard. While following the steps in the deployment section in this tutorial, you might get this error message below while trying to deploy to Baobab.
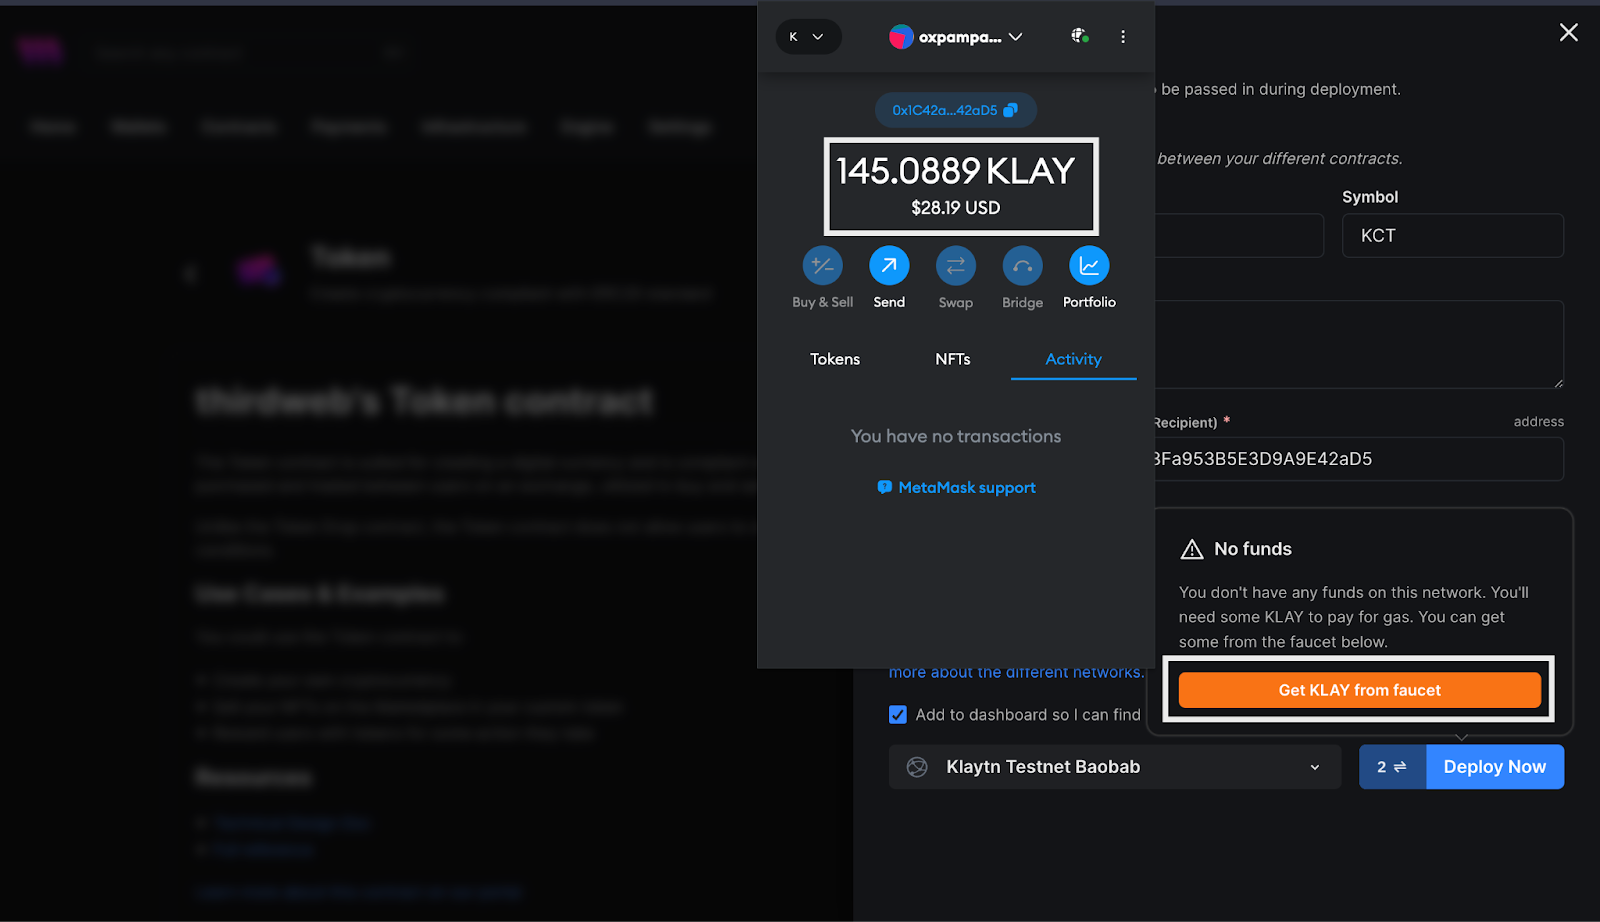
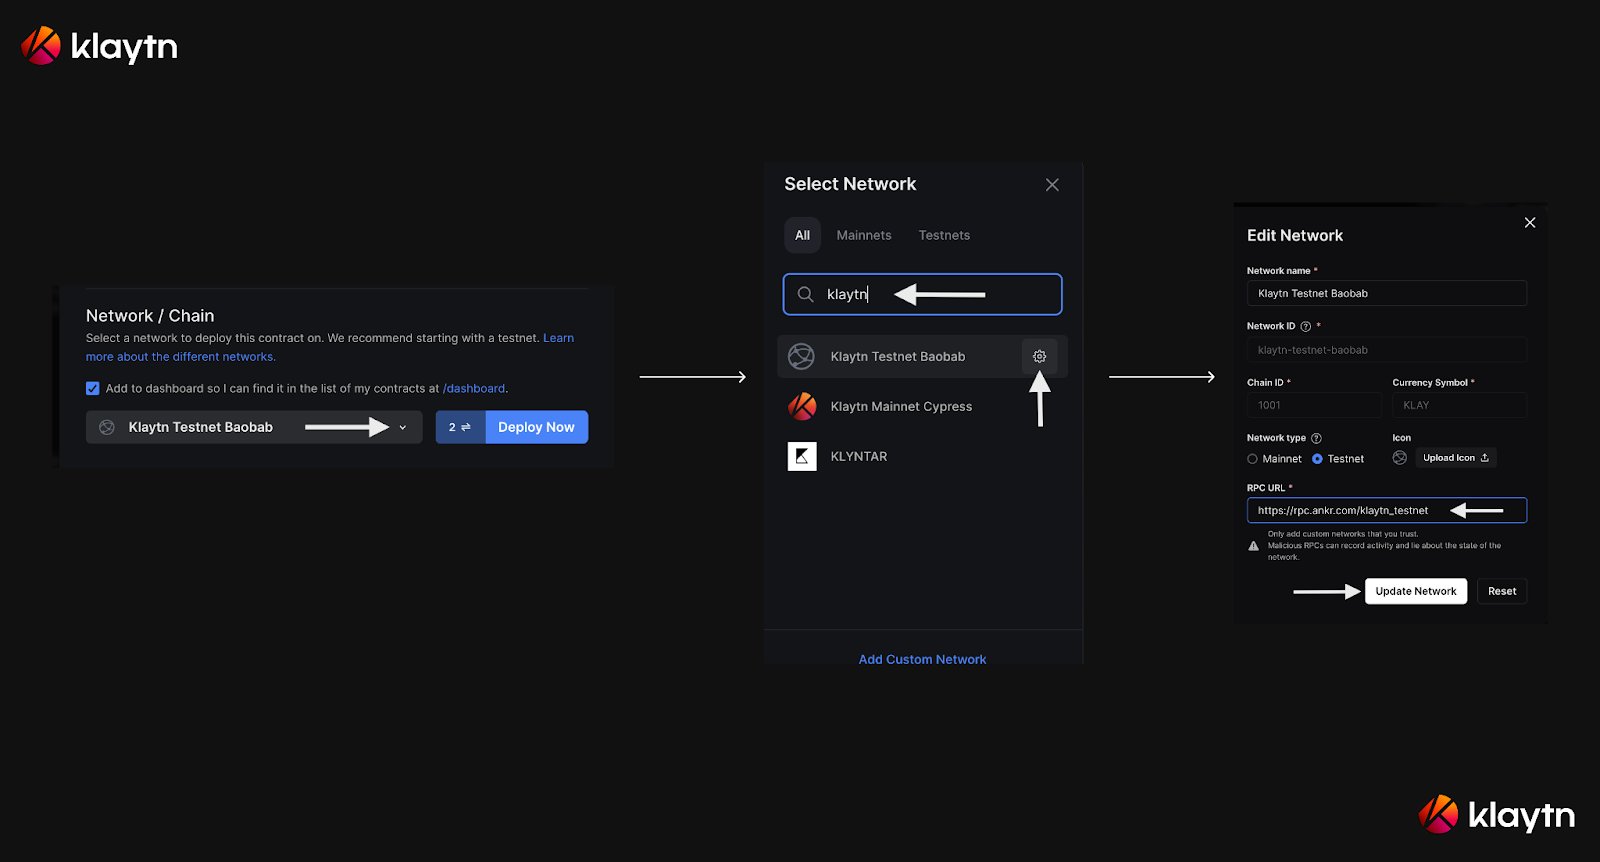
To fix this, do the following:
- Search for Klaytn Testnet in the network selector
- Click on the settings icon next to it
- Replace the existing rpc url with this: https://klaytn-baobab-rpc.allthatnode.com:8551 or any from RPC providers here
- Click the update network button and then refresh your page.
In the next sections, we will be creating, deploying and building our dApp. Let’s jump right in!
Creating and deploying the Staking Smart Contract using Thirdweb
In this section, we will create and deploy our staking smart contract using thirdweb dashboard.
To get started, we need to create and deploy the following dependent contracts before deploying the StakeERC20 contract itself:
a: Staking Token Contract: This stands as our erc20 stake tokens.
b. Reward Token Contract: This also is a separate erc20 tokens for stake rewards.
| To create and deploy contracts using thirdweb dashboard, make sure you are successfully signed-in. |
Creating and deploying staking token contract
We would create and deploy the staking token contracts in the following steps:
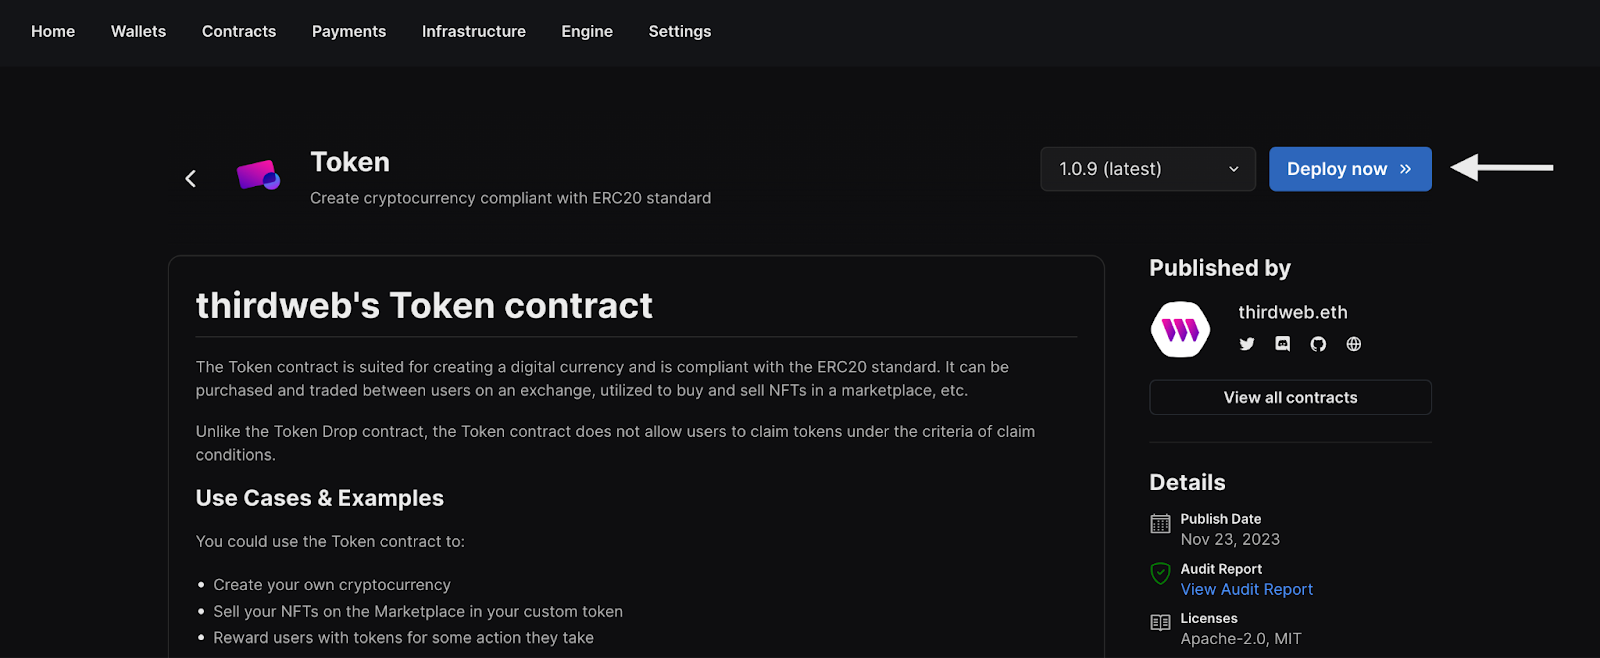
- Navigate to the contracts tab and explore section and select the Token contract to create ERC20 staking tokens.
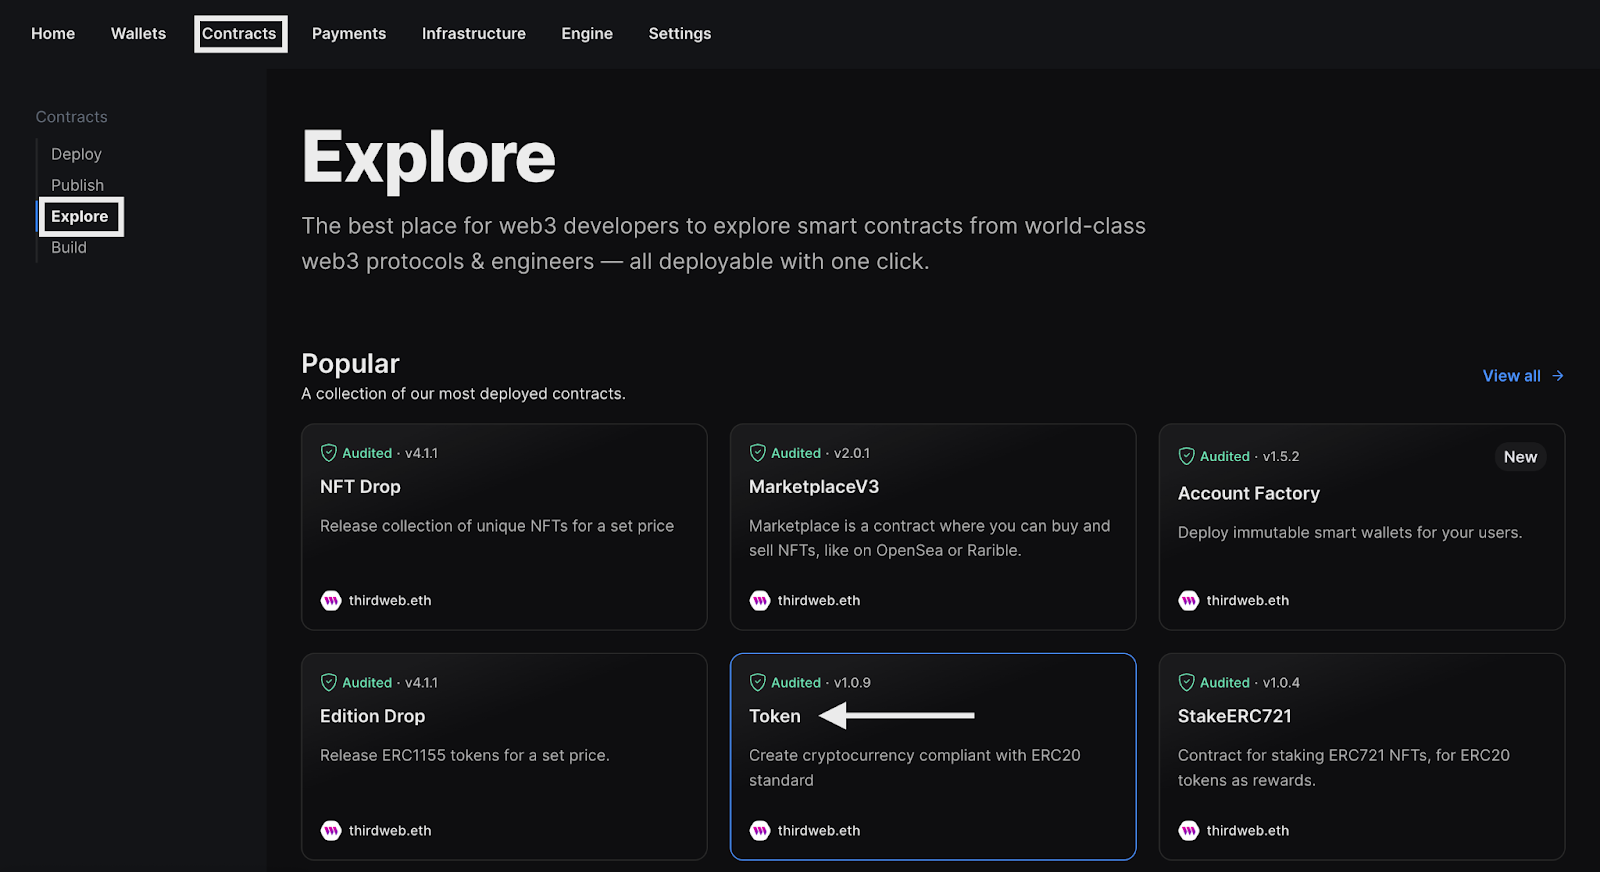
2. Click on the Deploy Now button
3. Fill in the contract parameters such as NAME (KCT), SYMBOL (KCT), etc, configure the chain (Klaytn Cypress) you want to deploy to and hit the Deploy Now button.
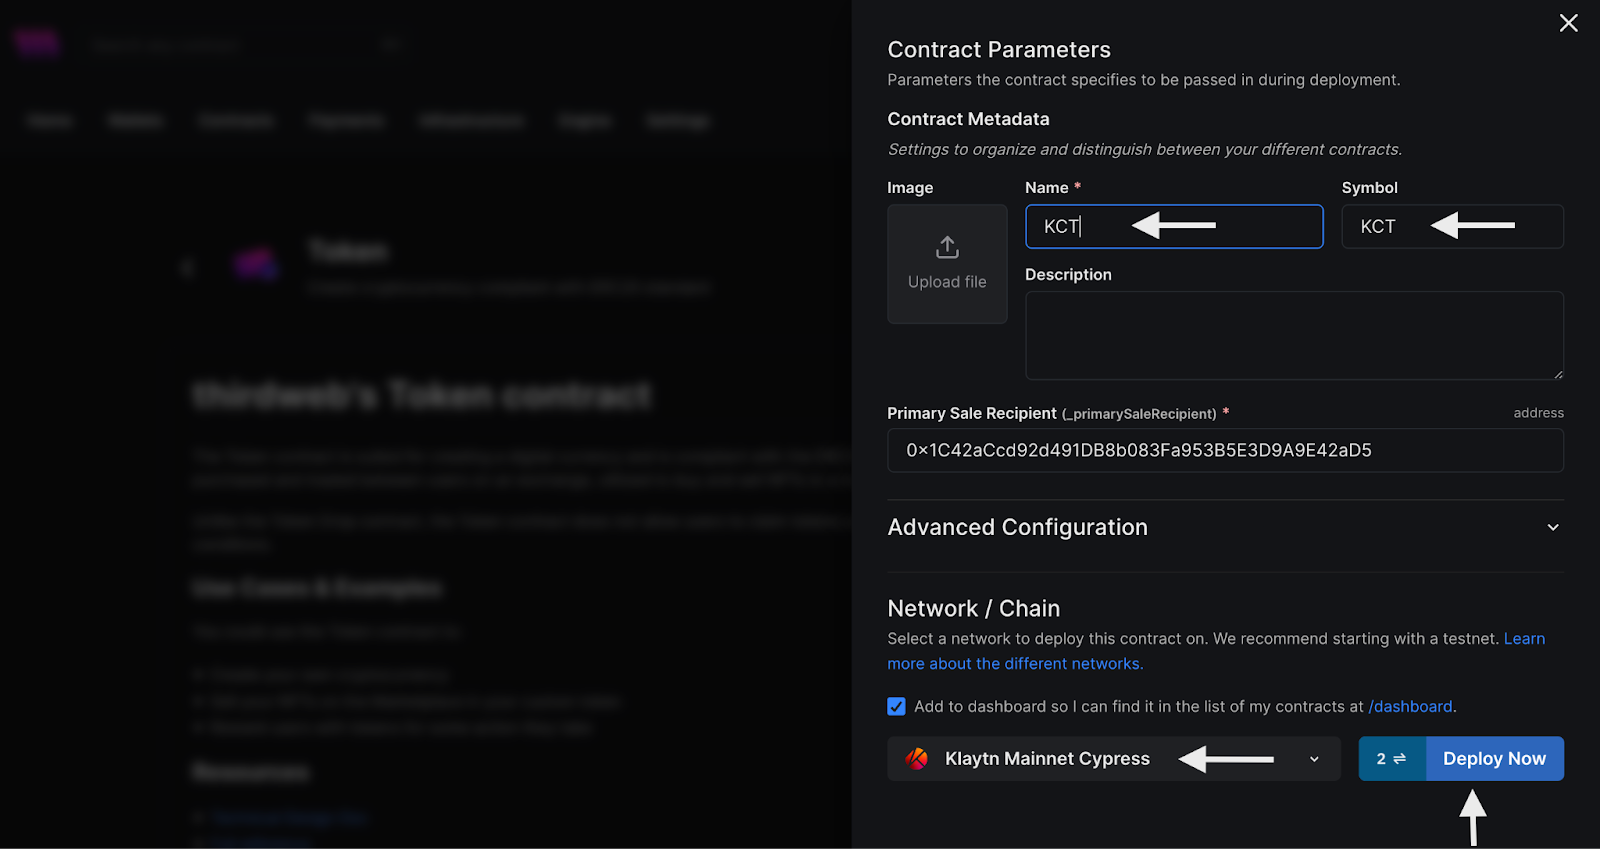
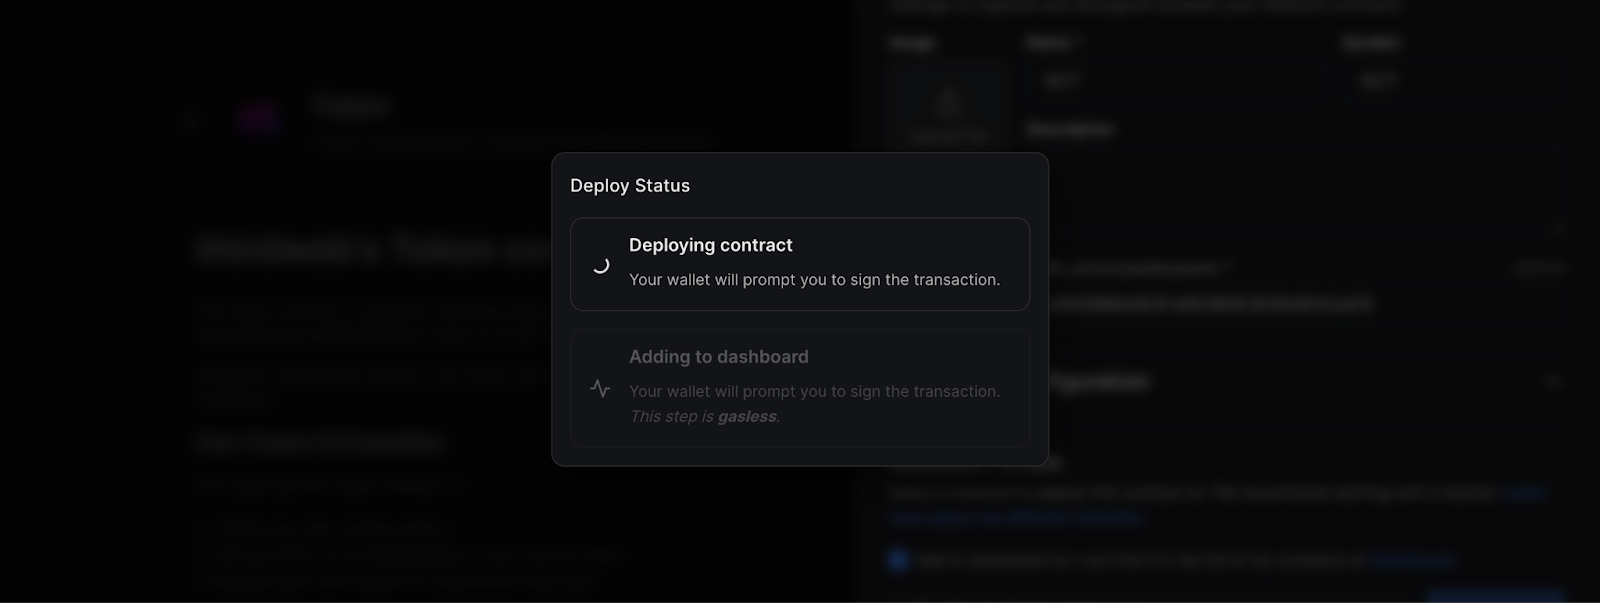
4. Confirm the transaction and wait for your contract to be deployed and added to the contract dashboard.
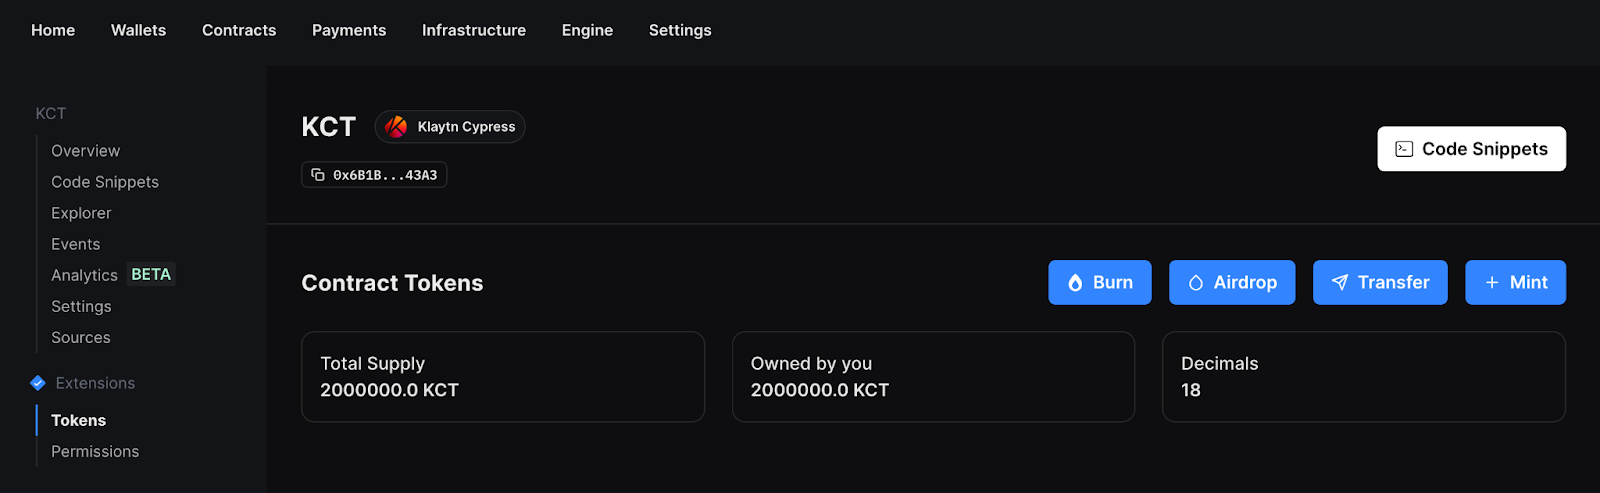
5. Once the newly deployed contract dashboard is loaded, navigate to Token section to mint new tokens

6. Fill in the additional supply value. In our case, that would be 2,000,000 KCT tokens to be minted.
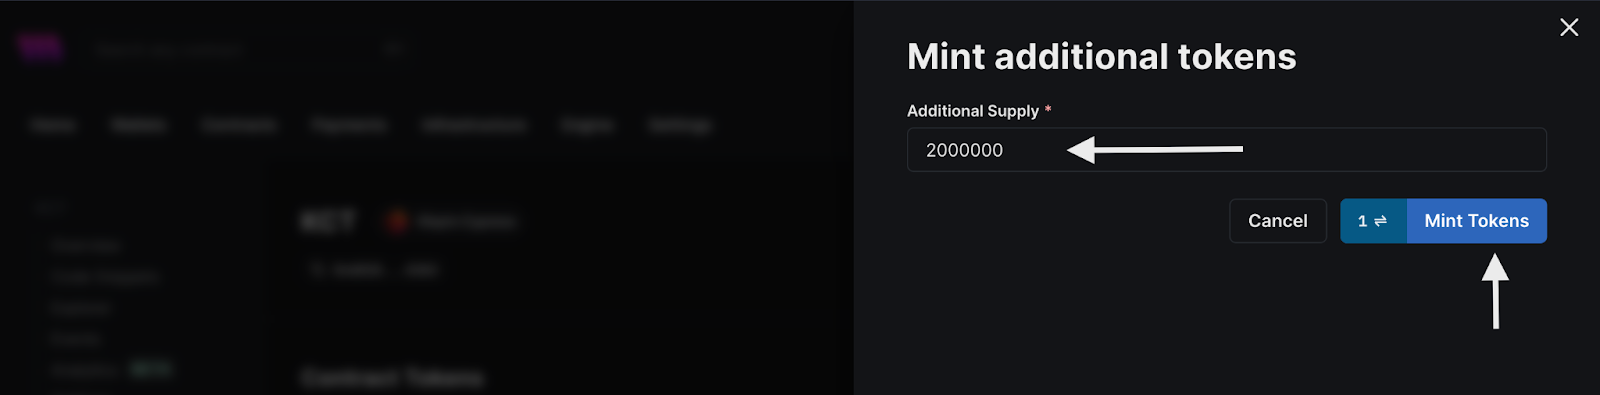
7. Confirm the transaction and wait for the tokens to be successfully minted.
Creating and deploying reward token contract
We would create and deploy the reward token contracts in the following steps:
- Navigate to the contracts tab and explore section, select the Token contract to create an ERC20 staking reward tokens
- Click on the Deploy Now button
- Fill in the contract parameters such as NAME(rewardsKCT), SYMBOL(rKCT), etc, configure the chain (Klaytn Cypress) you want to deploy to and hit the Deploy Now button.
- Confirm the transaction and wait for your contract to be deployed and added to the contract dashboard.
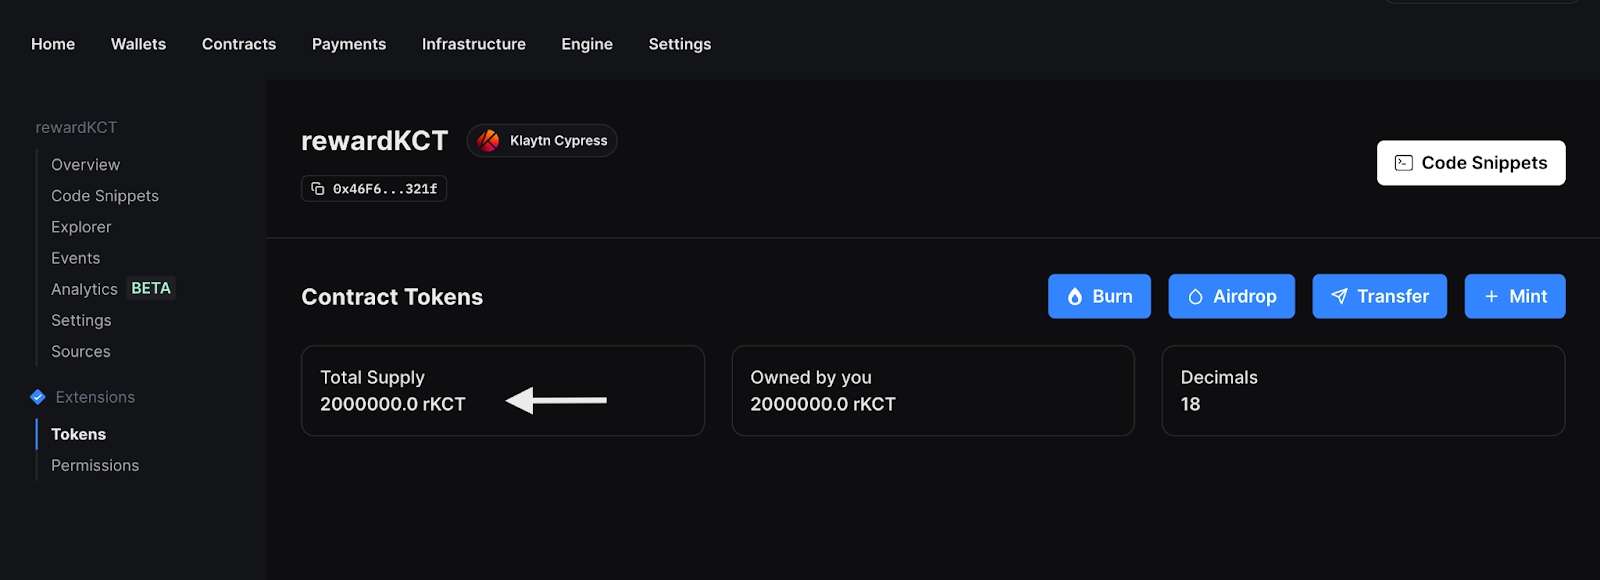
- Once the newly deployed contract dashboard is loaded, navigate to Token section to mint new tokens
- Fill in the additional supply value. In our case, that would be 2,000,000 rKCT tokens to be minted.
- Confirm the transaction and wait for the tokens to be successfully minted.
Creating and deploying staking contract
We would create and deploy the staking token contracts in the following steps:
- Navigate to the contracts tab and explore section, select the StakeERC20 contract in the Staking section to create a staking contract.

2. Click on the Deploy Now button
3. Fill in the contract parameters such as NAME(ERC20Stake), SYMBOL(ERC20SC), etc, also the following dependents arguments:
1) ERC20 reward tokens address: Paste the contract address of the reward token (rKCT) previously deployed
2) ERC20 staking tokens address: Paste the contract address of the staking token (KCT) previously deployed
3) Time unit for rewards: refers to the number of seconds to give out rewards. In our case we entered 60 meaning we would be giving out rewards every 1 mins.
4) Reward ratio numerator: refers to the reward amount for every token staked. In our case, the reward ratio numerator will be 1 and reward ratio denominator will be 50, this implies that there will be 1 Reward token given out for every 50 tokens staked.
5) Reward ratio denominator: set to 50.
4. Configure the chain (Klaytn Cypress) you want to deploy to and hit the “Deploy Now” button.
5. Confirm the transaction in your wallet and wait for your contract to be deployed and added to the contract dashboard.
Connecting contract together
In this section, we would be approving the staking contract to spend 1,000,000 rewardsKCT (rKCT) tokens and then call the depositRewardTokens() function to deposit that amount in the staking contract to give out as rewards tokens.
Let go over that process in the following steps:
Approving the ERCStake contract from rewardsKCT contract
- Copy the ERC20Stake contract address from your contract dashboard
- Navigate to the rewardsKCT contract in your contract dashboard.
- In your rewardsKCT contract panel, navigate to the explorer section and click on the approve function
- Fill in the approve function arguments: address (ERC20Stake contract address) and amount (1000000000000000000000000) and click execute.
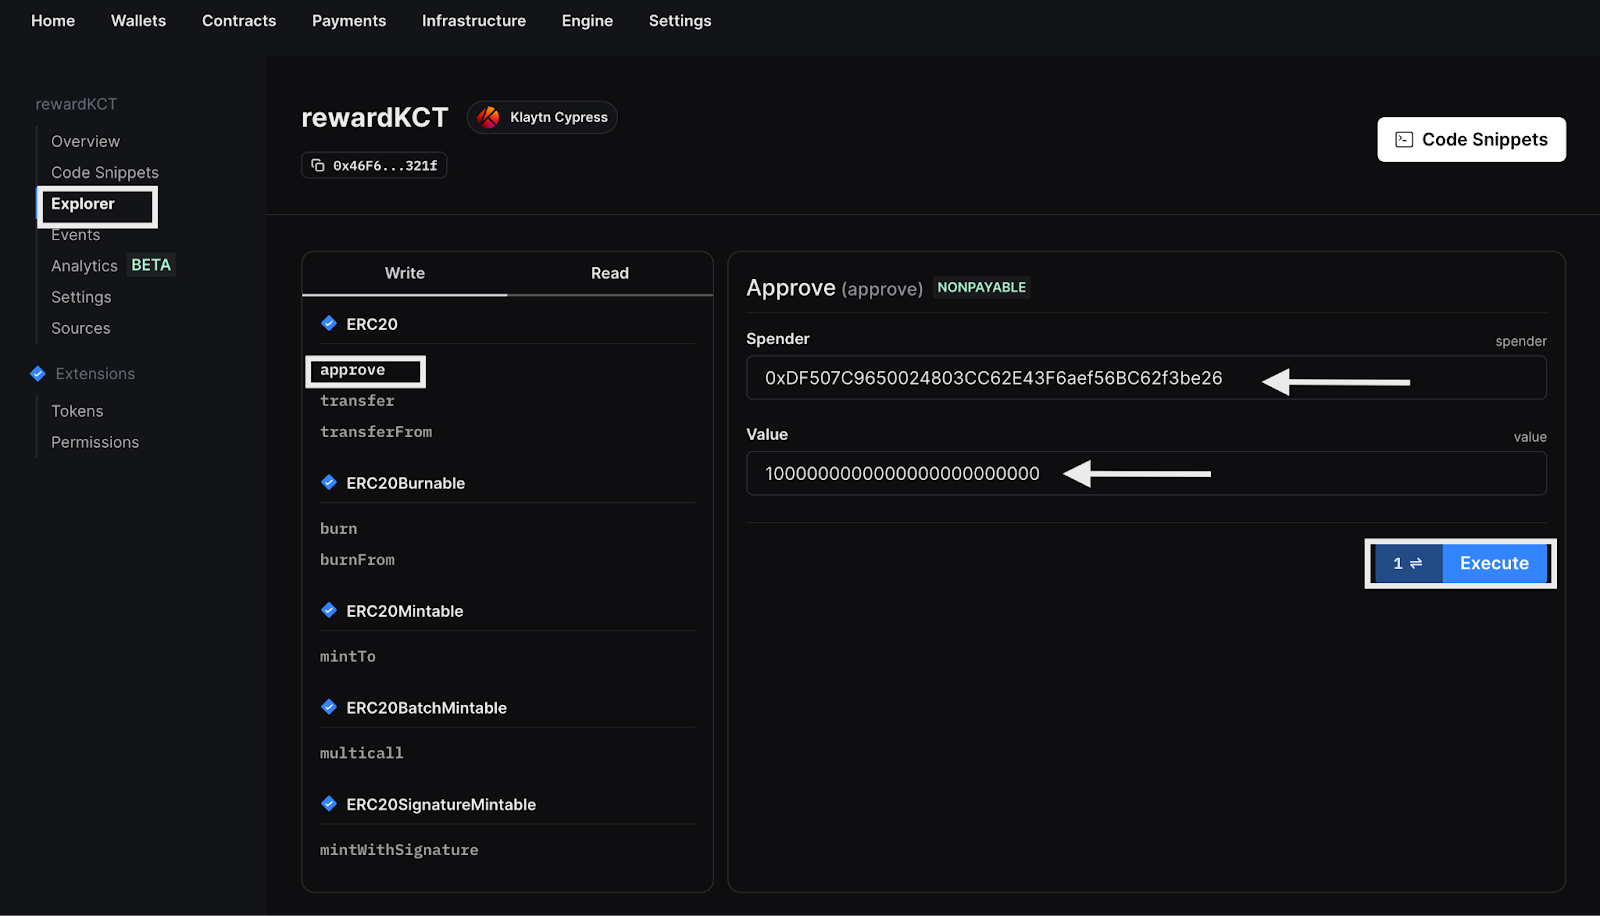
- Confirm the transaction and wait for your transaction to be executed.
Depositing the rewardsToken in the ERC20Stakecontract
- Navigate to the ERC20Stake contract in your contract dashboard.
- In your ERC20Stake contract panel, navigate to the explorer section and click on the depositRewardTokens function
- Fill in the depositRewardTokens function arguments: amount (1000000000000000000000000) and native token value (0) and click execute.
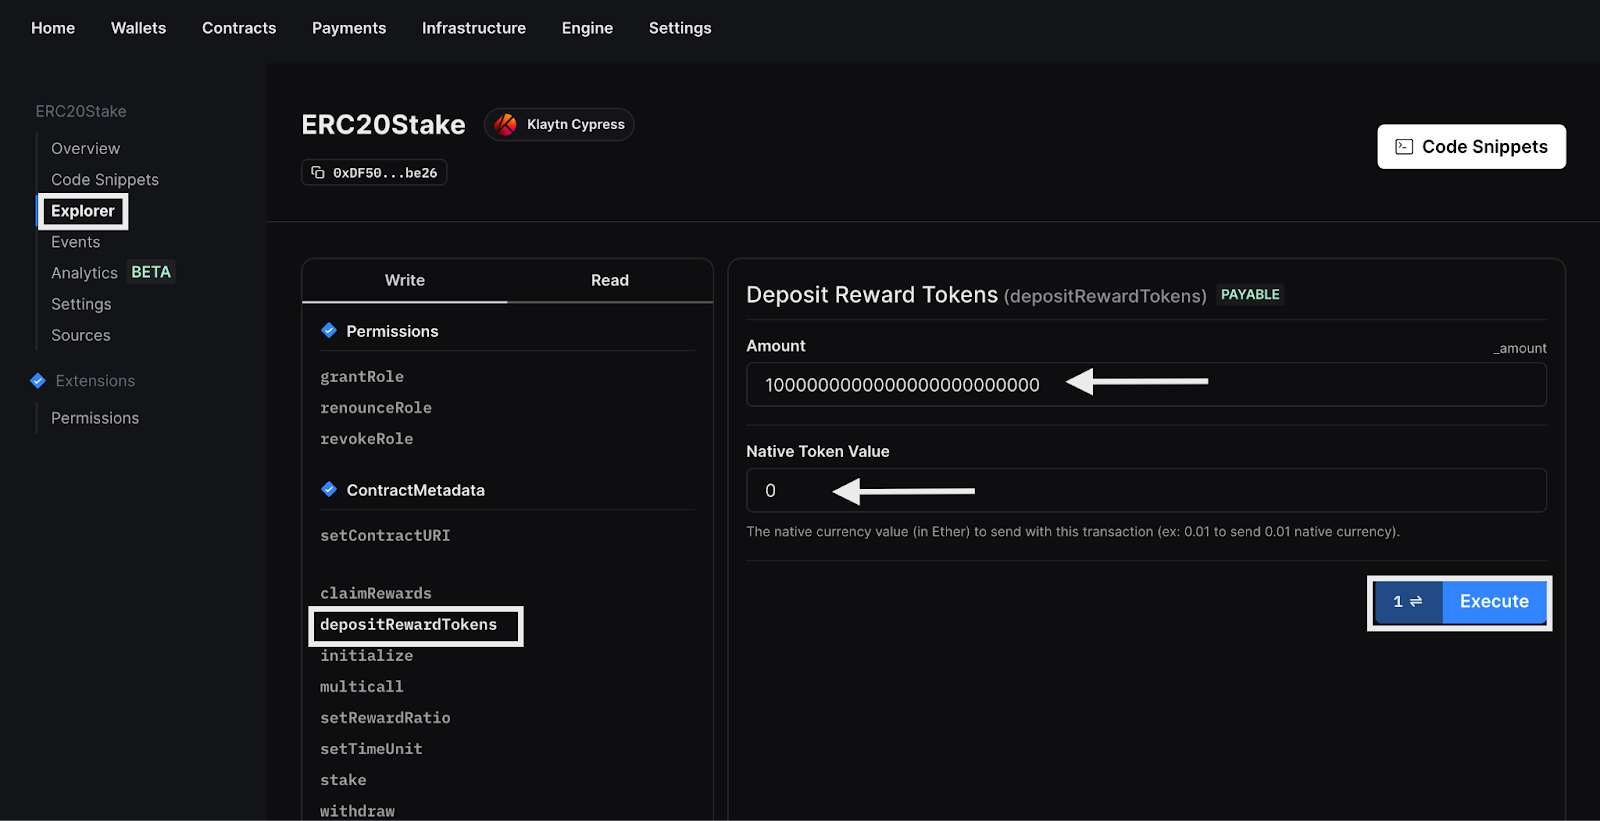
- Confirm the transaction and wait for your transaction to be executed.
- Once the transaction has been executed, the amount of rewardsTokens owned by the token owner should reduce.

Now that we have our contracts all set up, we can now build the frontend for interactions.
Building the frontend using thirdweb-create-app
In this section, we will build the frontend for our staking dApp using thirdweb-create-app.
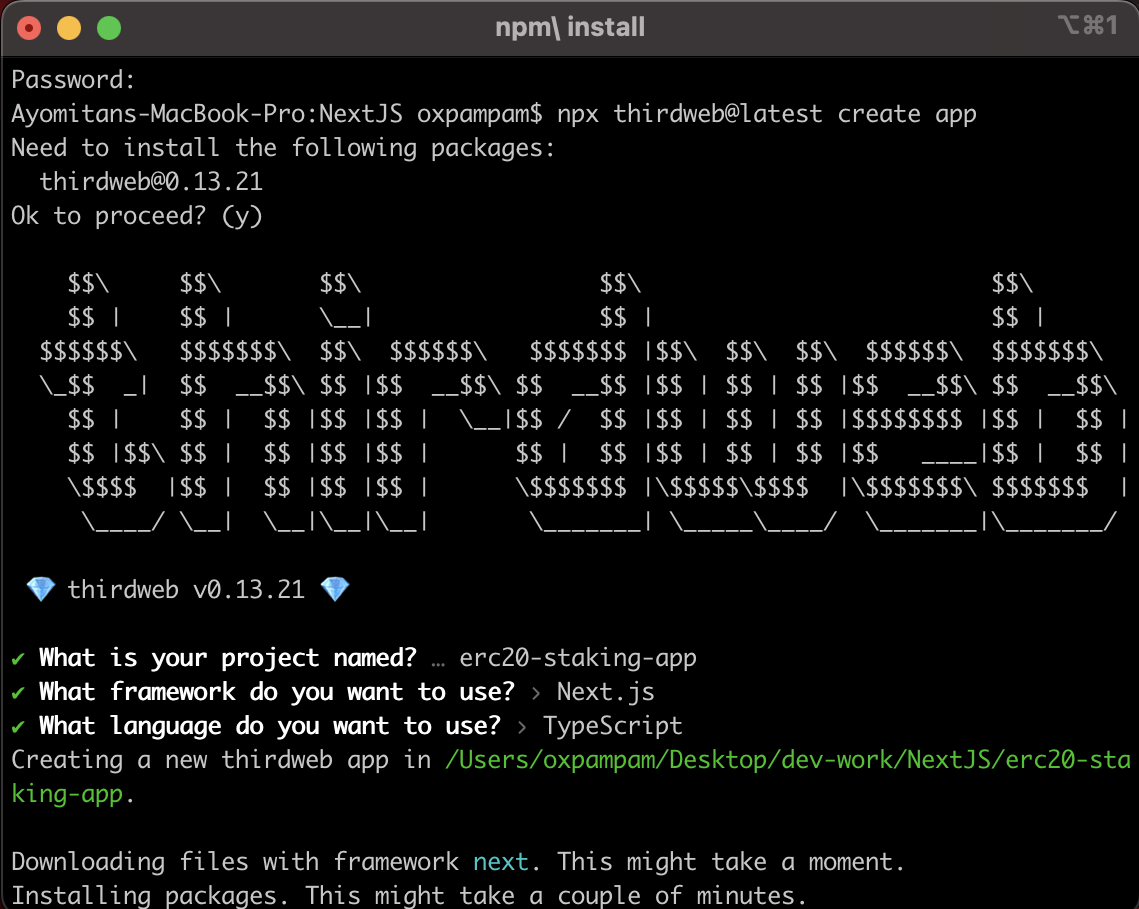
To see this in action, run the command below:
bash

npx thirdweb@latest create app
While installing, you will be prompted to fill out the following:
- project name: input your project name.
- framework: for this guide, we will use NextJs.
- language: for this guide, we will use Typescript.
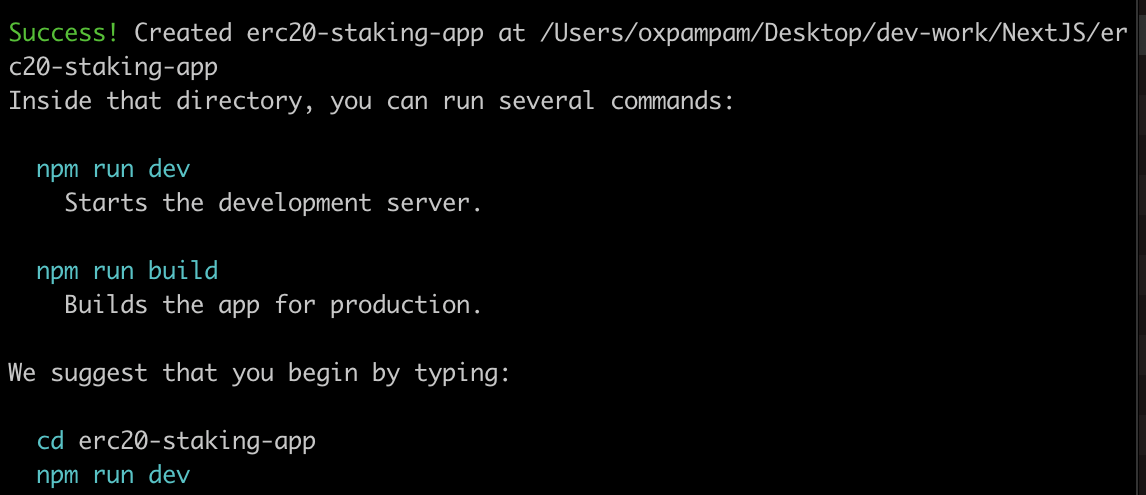
Once the dependencies are successfully installed, you should get a success message like the one below.
Basic Setup
After successfully initializing your project, make sure you are in the correct project directory.
Set Chain
Navigate to your `_app.tsx` file and paste the code below at the top of the file.
ts

import { KlaytnCypress} from "@thirdweb-dev/chains";| *Note: We are trying to set the chain our dApp will work on; in this case, Klaytn Cypress. To do so, we imported Klaytn Cypress from `@thirdweb-dev/chains` and passed them directly into the activeChain variable in your ThirdWebProvider component. Your _app.tsx file should look like this: |
ts

import type { AppProps } from "next/app";

import { ThirdwebProvider } from "@thirdweb-dev/react";

import { KlaytnCypress} from "@thirdweb-dev/chains";

import "../styles/globals.css";

// This is the chain your dApp will work on.

// Change this to the chain your app is built for.

// You can also import additional chains from `@thirdweb-dev/chains` and pass them directly.

 function MyApp({ Component, pageProps}: AppProps) {

  return (

    <ThirdwebProvider

      clientId={process.env.NEXT_PUBLIC_TEMPLATE_CLIENT_ID}

      activeChain={KlaytnCypress}

    >

<Component {...pageProps} />

    </ThirdwebProvider>

  );

}

export default MyApp;
Set Constants
Let’s make available the addresses of the following contracts in our app:
- Stake Token Address
- Reward Token Address
- Stake Contract Address
To do this, create a new folder called constants in the project root folder with a new file named “contract-addresses.ts”. Paste the following in your newly created file:
ts

// Copy each address from your contract deployed dashboard

export const STAKE_TOKEN_ADDRESS = "PASTE STAKE TOKEN ADDRESS"

export const REWARD_TOKEN_ADDRESS = "PASTE REWARD TOKEN ADDRESS"

export const STAKE_CONTRACT_ADDRESS = "PASTE STAKE CONTRACT ADDRESS"
Set Client Id
Make sure you have copied your client ID from your thirdweb settings panel under the API keys dashboard. Next is to rename .env.example to.env, and then paste the client ID in the .env file.
Building App Components
In this section, we will create the various components needed for our application. To do so, we will create a new folder named components in the project root folder. This folder will contain the following components as a subfolder:
- NavBar
- StakeToken
- RewardStakeToken
- Stake
| > Note: You can decide to style each component using your own styles or by using any CSS framework of your choice. |
NavBar.tsx
ts

import { ConnectWallet } from "@thirdweb-dev/react";

import styles from './NavBar.module.css'

export default function NavBar() {

    return (

        <div className={styles.header}>

            <h1 className={styles.header_title}>Staking dApp</h1>

            <div className="header-connect-btn">

                <ConnectWallet />

            </div>

        </div>

    )

}
The code above imports a ConnectWallet component from thirdweb that renders a button which when clicked opens a modal to allow users to connect to specified wallets. Also we have its stylesheet imported. The NavBar component comprises of two major elements:
- The app header which is expressed as an h1 tag.
- connectWallet component.
StakeToken.tsx
ts

import { useAddress, useContract, useTokenBalance } from "@thirdweb-dev/react";

import { STAKE_TOKEN_ADDRESS } from "../../constants/contract-addresses";

import styles from "./StakeToken.module.css";

export default function StakeToken() {

  const address = useAddress();

  const { contract: stakeTokenContract, isLoading: loadingStakeToken } =

    useContract(STAKE_TOKEN_ADDRESS);

  const { data: tokenBalance, isLoading: loadingTokenBalance } =

    useTokenBalance(stakeTokenContract, address);

  const { contract: stakeTokenCont, isLoading: loadingStakeTok } =

    useContract(STAKE_TOKEN_ADDRESS);

  return (

    <div className={styles.stakeTokenCard}>

      <h2>Stake Tokens</h2>

      {!loadingStakeToken && !loadingTokenBalance ? (

        <div className={styles.stakeTokenBalance}>

          <p>${tokenBalance?.symbol}</p>

          <p>{tokenBalance?.displayValue}</p>

        </div>

      ) : (

        <p>loading....</p>

      )}

    </div>

  );

}
The component above displays the stake tokens balance of the connected wallet address to the UI. To achieve this, we imported the following:
- UseAddress: a hook provided by thirdweb to get the currently connected wallet address.
- UseContract: a hook provided by thirdweb for connecting to a smart contract.
- UseTokenBalance: a hook provided by thirdweb for fetching the balance a wallet has for a specific ERC20 token.
- StakeToken Address: the contract address of the stake token contract deployed using thirdweb dashboard.
RewardToken.tsx
ts

import { useAddress, useContract, useTokenBalance } from "@thirdweb-dev/react";

import { REWARD_TOKEN_ADDRESS } from "../../constants/contract-addresses";

import styles from "./RewardStakeToken.module.css";

export default function RewardStakeToken() {

  const address = useAddress();

  const { contract: rewardStakeTokenContract, isLoading: loadingStakeToken } =

    useContract(REWARD_TOKEN_ADDRESS);

  const { data: tokenBalance, isLoading: loadingTokenBalance } =

    useTokenBalance(rewardStakeTokenContract, address);

  return (

    <div className={styles.rewardStakeTokenCard}>

      <h2>Reward Tokens</h2>

      {!loadingStakeToken && !loadingTokenBalance ? (

        <div className={styles.rewardStakeTokenBalance}>

          <p>${tokenBalance?.symbol}</p>

          <p>{Number(tokenBalance?.displayValue).toFixed(1)}</p>

        </div>

      ) : (

        <p>loading....</p>

      )}

    </div>

  );

}
The component above displays the reward tokens balance of the connected wallet address to the UI. The code above utilizes the same hooks we used in `stakeToken.tsx`, except that we additionally imported the reward token contract address.
Stake.tsx
ts

import {

  Web3Button,

  useAddress,

  useContract,

  useContractRead,

  useTokenBalance,

} from "@thirdweb-dev/react";

import {

  STAKE_TOKEN_ADDRESS,

  REWARD_TOKEN_ADDRESS,

  STAKE_CONTRACT_ADDRESS,

} from "../../constants/contract-addresses";

import React, { useEffect, useState } from "react";

import { ethers } from "ethers";

import styles from "./Stake.module.css";

export default function Stake() {

  const address = useAddress();

  const { contract: stakeTokenContract } = useContract(

    STAKE_TOKEN_ADDRESS,

    "token"

  );

  const { contract: rewardStakeTokenContract } = useContract(

    REWARD_TOKEN_ADDRESS,

    "token"

  );

  const { contract: stakeContract } = useContract(

    STAKE_CONTRACT_ADDRESS,

    "custom"

  );

  const {

    data: stakeInfo,

    refetch: refetchStakeInfo,

    isLoading: loadingStakeInfo,

  } = useContractRead(stakeContract, "getStakeInfo", [address]);

  const { data: stakeTokenBalance, isLoading: loadingStakeTokenBalance } =

    useTokenBalance(stakeTokenContract, address);

  const {

    data: rewardStakeTokenBalance,

    isLoading: loadingRewardStakeTokenBalance,

  } = useTokenBalance(rewardStakeTokenContract, address);

  useEffect(() => {

    setInterval(() => {

      refetchStakeInfo();

    }, 10000);

  }, []);

  const [stakeAmount, setStakeAmount] = useState<string>("0");

  const [unstakeAmount, setUnstakeAmount] = useState<string>("0");

  function resetValue() {

    setStakeAmount("0");

    setUnstakeAmount("0");

  }

  return (

    <div>

      <h2 className={styles.stakeCenterText}>Earn Reward Tokens</h2>

      <div className={styles.stakeCenter}>

        <div>

          <p>Stake Token:</p>

          {!loadingStakeInfo && !loadingStakeTokenBalance ? (

            <div>

              {stakeInfo && stakeInfo[0] ? (

                <p>

                  {ethers.utils.formatEther(stakeInfo[0])}{" "}

                  {"$ " + stakeTokenBalance?.symbol}

                </p>

              ) : (

                <p>0</p>

              )}

            </div>

          ) : (

            <p>loading...</p>

          )}

          <div className={styles.stakeContentCenter}>

            <div className={styles.stakeForm}>

              <input

                type="number"

                max={stakeTokenBalance?.displayValue}

                value={stakeAmount}

                onChange={(e) => {

                  setStakeAmount(e.target.value);

                }}

              />

              <Web3Button

                contractAddress={STAKE_CONTRACT_ADDRESS}

                action={async (contract) => {

                  await stakeTokenContract?.setAllowance(

                    STAKE_CONTRACT_ADDRESS,

                    stakeAmount

                  );

                  await contract.call("stake", [

                    ethers.utils.parseEther(stakeAmount),

                  ]);

                  resetValue();

                }}

                onSuccess={() => {

                  alert("Staking was successful");

                }}

              >

                Stake

              </Web3Button>

            </div>

            <div className={styles.unstakeForm}>

              <input

                type="number"

                value={unstakeAmount}

                onChange={(e) => {

                  setUnstakeAmount(e.target.value);

                }}

              />

              <Web3Button

                contractAddress={STAKE_CONTRACT_ADDRESS}

                action={async (contract) => {

                  await contract.call("withdraw", [

                    ethers.utils.parseEther(unstakeAmount),

                  ]);

                  resetValue();

                }}

                onSuccess={() => {

                  alert("Unstake was successful");

                }}

              >

                UnStake

              </Web3Button>

            </div>

          </div>

        </div>

        <div>

          <p>Reward Token</p>

          {!loadingStakeInfo && !loadingStakeTokenBalance ? (

            <div>

              {stakeInfo && stakeInfo[0] ? (

                <p>

                  {ethers.utils.formatEther(stakeInfo[1])}{" "}

                  {"$ " + rewardStakeTokenBalance?.symbol}

                </p>

              ) : (

                <p>0</p>

              )}

            </div>

          ) : (

            <p>loading...</p>

          )}

          <Web3Button

            contractAddress={STAKE_CONTRACT_ADDRESS}

            action={async (contract) => {

              await contract.call("claimRewards");

              resetValue();

            }}

            onSuccess={() => {

              alert("Claim Reward was successful");

            }}

          >

            Claim

          </Web3Button>

        </div>

      </div>

    </div>

  );

}
The component above provides users the ability to stake, unstake and claim their stake rewards. To do so, we imported as an addition the following hooks and components:
- Web3Button: a UI component provided by thirdweb to execute a function on a smart contract from the connected wallet when clicked.
- useContractRead: a hook provided by thirdweb for reading any data from a smart contract via it’s function/view/variable name
Also, we imported the respective contract addresses: stakeTokenAddress, rewardTokenAddress, and stakeContractAddress.
The component initializes stakeAmount and unstakeAmount state variables using the useState hook.
The useEffect hook is used to fetch the stakeInfo of the connected user every 1 second when the component mounts.
Index.tsx
ts

import styles from "../styles/Home.module.css";

import StakeToken from "../components/StakeToken/StakeToken";

import RewardStakeToken from "../components/RewardStakeTokens/RewardStakeToken";

import Stake from "../components/Stake/Stake";

import { NextPage } from "next";

import { useAddress } from "@thirdweb-dev/react";

const Home: NextPage = () => {

  const address = useAddress()

  if (!address) {

    return (

      <p className={styles.connect_text}><strong>Please Connect Your Wallet</strong></p>

    )

  }

  return (

    <main className={styles.mainContainer}>

      <div className={styles.container}>

        <StakeToken/>

        <RewardStakeToken />

      </div>

        <div className={styles.stakeContainer}>

          <Stake/>

        </div>

    </main>

  );

};

export default Home;
The code above does the following
- Checks if a user has connected their wallet and if otherwise, displays the “Please Connect Your Wallet”
- Connects all the different app components together in one place.
_app.tsx
This is what your `_app.tsx` file should look like:
ts

import type { AppProps } from "next/app";

import { ThirdwebProvider } from "@thirdweb-dev/react";

import { KlaytnCypress} from "@thirdweb-dev/chains";

import "../styles/globals.css";

import NavBar from "../components/NavBar/NavBar";

// This is the chain your dApp will work on.

// Change this to the chain your app is built for.

// You can also import additional chains from `@thirdweb-dev/chains` and pass them directly.

function MyApp({ Component, pageProps }: AppProps) {

  return (

    <ThirdwebProvider

      clientId={process.env.NEXT_PUBLIC_TEMPLATE_CLIENT_ID}

      activeChain={KlaytnCypress}

    >

      <NavBar />

      <Component {...pageProps} />

    </ThirdwebProvider>

  );

}

export default MyApp;
Run Application
Having successfully configured the application to our needs, let’s see how the application works. To do so, run the command below:
bash

npm run dev
You should get a prompt to open the app in your localhost: http://localhost:3000
Conclusion
Congratulations! 🥳 You were able to successfully build a full-fledged application on Klaytn blockchain using thirdweb. In this article, we built a simple staking dApp that allows users to stake,unstake, and claim their stake rewards.
This tutorial only scratched the surface of using thirdweb for your decentralized application capabilities. For more information about building on Klaytn using ThirdWeb, kindly visit Klaytn Docs and ThirdWeb Docs. And if you have any other questions, please feel free to drop by our Discord and ask!