Introduction
While developing a dApp, getting and displaying a user’s token balance is an essential feature as it allows the users to know the current state of their crypto assets, as such opening them up to the possibilities of dApp:
- Staking
- Trading
- Minting
- Farming
- other services powered by the dApp.
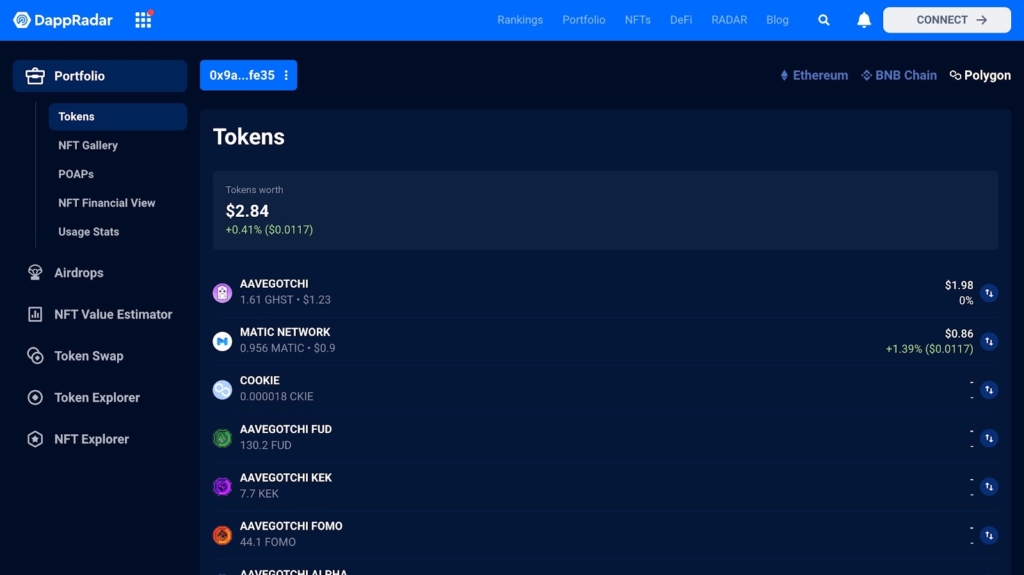
A practical example application that displays the user’s balance is DappRadar – a platform that enables users to track, analyze, and discover decentralized applications.
You might be wondering, how are all these balances retrieved? Let’s dive in!
All state changes made to the blockchain are triggered by a transaction. These transactions may include:
- smart contract deployment,
- function invocation
- value transfer.
In the case of value transfer, a reduction and increase in balance is meant to take place right? Yes! This change is updated and synchronized on the blockchain.
Querying these transactions in real life would require a developer to run his own full node to know the blockchains state in order to make a correct transaction based on the current state. This is quite a bothersome task as you would not want to run your own node for that single purpose. That’s when Covalent steps in. By using Covalent, you can offload most of the heavy lifting when getting tokens and NFT balances.
Covalent provides a unified API bringing visibility to billions of Web3 data points allowing developers to allocate resources to higher-utility goals. Covalent aggregates information from across dozens of sources including nodes, chains and data feeds.
Most importantly, Covalent returns this data in a rapid and consistent manner, incorporating all relevant data within one API interface.
In this guide, we are going to use Covalent to get our tokens and NFT balances with one line of code, which is why you need to sign up to get your API Key.
Joining the platform is free, and it will provide you with immediate access to all data endpoints. Covalent allows developers to drastically cut time, costs and complexity resulting from blockchain application development.
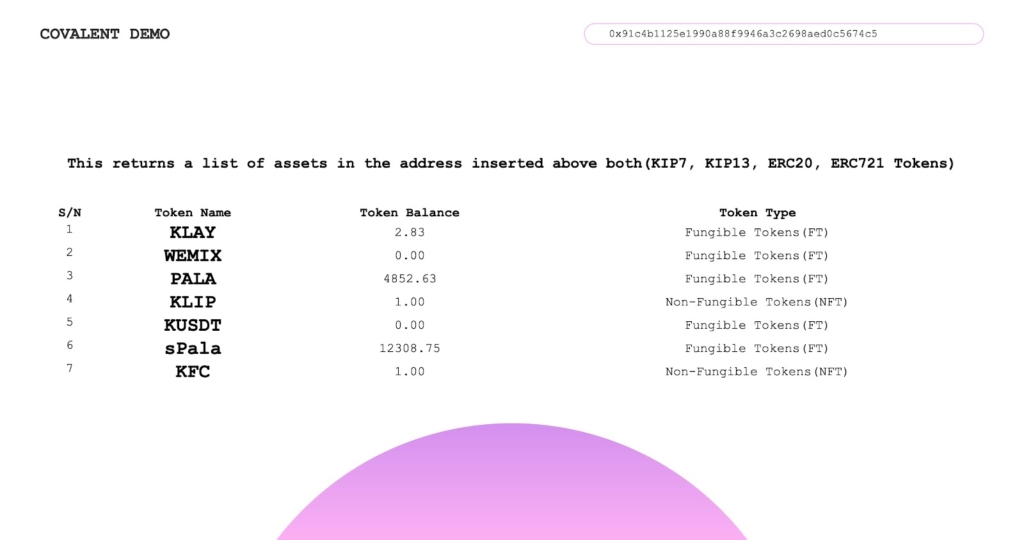
What we are building
We will work on creating an app that displays users’ tokens and NFT balance on the Klaytn Main Network (Cypress) using the Covalent API.
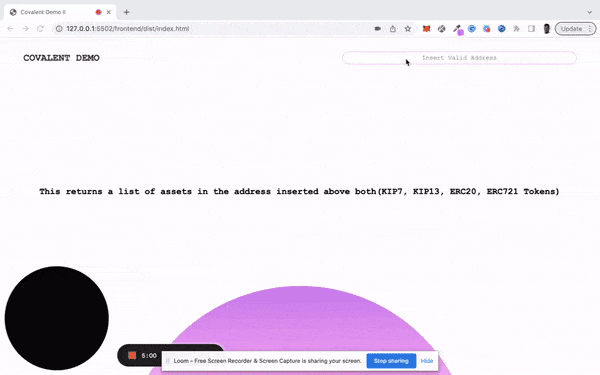
The final output will look like this:
Prerequisites
To follow along with this article, you will need:
- A basic understanding of HTML
- A basic understanding of JavaScript and DOM
- Webpack usage
Here is a more detailed summary of what we are going to do:
- Getting started with Covalent
- Building the Front-End
- Testing Our App
Getting started with Covalent
Covalent provides the industry-leading unified API, bringing visibility to billions of Web3 data points. With Covalent, developers don’t have to worry about investing expensive engineering time in building indexing code that you’d rather invest in building your application.
To get access to the full suite of data endpoints and tools provided by Covalent, you need to get your API KEY. After getting your keys, navigate to the docs on how to access these endpoints using different languages and packages built by covalent community.
You can check out the tools and languages, and use the languages you are familiar with. For the purpose of this article we will be using JavaScript.
Getting tokens and NFT Balance using Vanilla JavaScript
COPY
   const APIKEY = ‘API_KEY;
    const baseURL = 'https://api.covalenthq.com/v1'
    const blockchainChainId = '8217'
    const demoAddress = ‘your      demoAddress’

    async function getWalletBalance(chainId, address) {
            const url = new URL(`${baseURL}/${chainId}/address/${address}/balances_v2/?quote-
            currency=USD&format=JSON&nft=true&no-nft-fetch=false&key=${APIKEY}`);
            const response = await fetch(url);
            const result = await response.json();
           const data = result.data;
            console.log(data)
            return data;
    }

getWalletBalance(blockchainChainId, demoAddress);
To run this function in your terminal using node js, you’ll need to do the following:
- Install node-fetch
npm i node-fetch - Import node-fetch in your js file like this
import fetch from ‘node-fetch’;
globalThis.fetch = fetch - Add “type”:”module” in your package.json or change your extension from .js to .mjs
- Run this command
node index.js or node index.mjs
Your terminal should look like this

Getting tokens and NFT Balance using an NPM Package
To get started using this npm package, navigate to:
This npm package and can be installed by running:
npm i covalentjs
If you are working with Node.js, you can import the covalentjs package in your project with:
const covalentjs = require('covalentjs');That’s all it takes to include covalentjs in your project.
Now let’s take a look at how to get the token balances of a user given an address
COPY
async function getTokenAssets(addr) {
        //calls the getTokenBalance method on the covalentjs package inclusive of NFT balances
         const result = await covalentjs.classA.getTokenBalancesForAddress(8217, addr, { nft: true });
         console.log(result)</p>
Simple, right? It takes just one-line of code.
Building the Front-End
We would be building the core functional part of the app together, which is the input field – which receives the user’s address.
- Input field
You can customize and style your app whichever way you want it!!
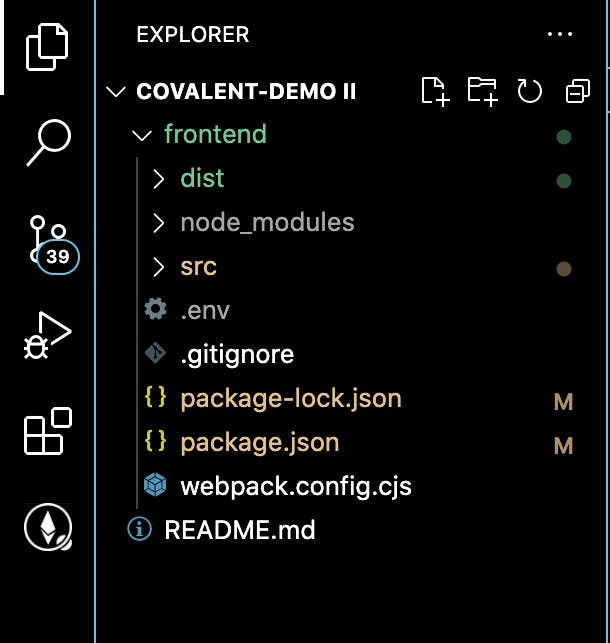
Before going into that, I would love to quickly talk about using webpack. If you are familiar with it – Godspeed! If you’re not, then navigate to the docs. So we have our project structured like this below:
Yay! Now that you have done that, let’s open src/index.js and write all our apps functionality. This would all be bundled up in dist/bundle.js which is referenced in our dist/index.html
A. Input field
HTML in dist/index.html
COPY
   <form class="form">
           <input type="text" name="userAddr" id="userAddr" placeholder="Insert Valid Address">
   </form>
JS in dist/index.js
COPY
 const form = document.querySelector('.form');
  form.addEventListener('submit', e => {
      e.preventDefault();
      const userAddr = form.userAddr.value
      getTokenAssets(userAddr);
  })
getTokenAssets function
COPY
 async function getTokenAssets(addr) {
          // calls the getTokenBalance method on the covalentjs package inclusive of NFT balances
        const result = await covalentjs.classA.getTokenBalancesForAddress(8217, addr, { nft: true });
        // logs all tokens data to the console
        console.log(result.data.items);
}
Our console would look like this when a user submits an address
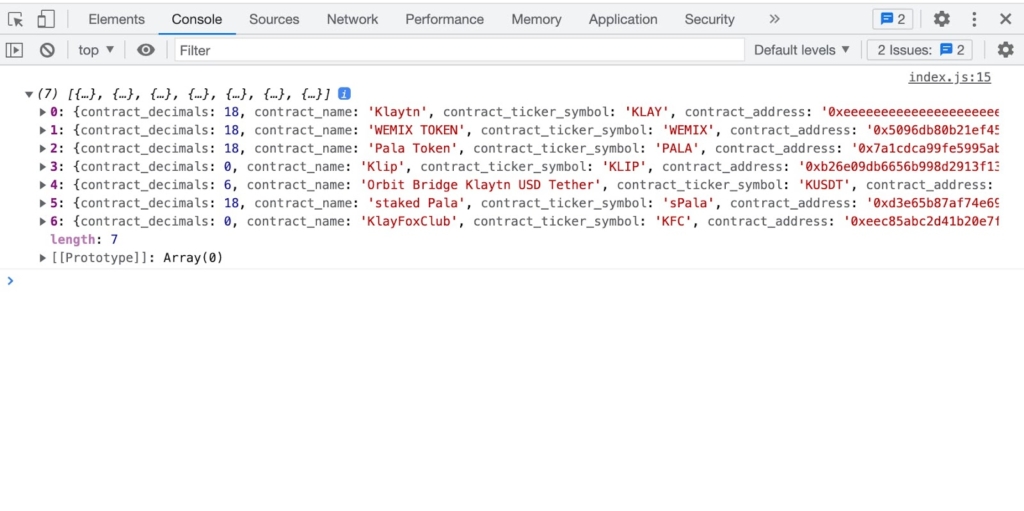
Now that we have our results in our console, let’s cook-up a Simple UI to display our data.
B. Simple UI
HTML in dist/index.html
COPY
    <main class="mainHeader">
                <table class="mainContent">
                    <thead class="thead">
                        <th> S/N</th>
                        <th> Token Name</th>
                        <th> Token Balance</th>
                        <th> Token Type</th>
                    </thead>

                    <tbody class="tbody"></tbody>
                </table>
            </main>
Update getTokenAssets Function
COPY
 async function getTokenAssets(addr) {
        const result = await covalentjs.classA.getTokenBalancesForAddress(8217, addr, { nft: true });
        console.log(result.data.items);

        if (result.data.items.length > 0) {
            displayItem(result.data.items);
        } else {
            alert("No assets found")
        }
}displayItem function
COPY
function displayItem(n) {
    const tbody = document.querySelector(".tbody");
    const thead = document.querySelector(".thead");
    for (let i = 0; i < n.length; i++) {
        thead.style.visibility = "visible";
        tbody.innerHTML += `
                <tr>
                        <td class="tdImg">${i + 1}</td>
                        <td><h2>${n[i].contract_ticker_symbol}</h2></td>
                        <td><p> ${formatValue(n[i].balance, n[i].contract_decimals).toFixed(2)}</p></td>
                        <td><p>${checkTokenType(n[i].type)}</p></td>
                </tr>
        `
        setTimeout(() => {
            thead.style.visibility = "hidden";
            tbody.innerHTML =  ``
        }, 10000);
    }
  }
That’s all for the major functionalities. Yay! our app is ready.
Testing our App
Conclusion
In this guide, we explained the Javascript implementation of getting our token balances on Klaytn using Covalent. We also saw the need for a tool as Covalent, as we don’t have to worry about investing time in building indexing code.
Now that you have fully gone through the process, we should also be aware that Covalent provides us with other functionalities and data endpoints, which enable us to build different use cases such as NFT Gallery, Crypto wallets, dashboard tools and so on. You can build different use cases as such on Klaytn using Covalent.
To get started, you can head over to the docs here.
You can check out the full source code here on GitHub and a live link here